Materials List:
2 pcs 45mm Birch Plywood 640mm x 70mm
2 pcs 70mm x 45mm x 250mm pine (legs)
2 pcs 33.7mm steel pipe with 2.8mm wall thickness 155mm long
2 pcs 18mm laminated plywood (for the Jaw faces)160mm x 83mm
4 pcs 95mm x 45mm x 160mm pine (for the Jaws)
2 pcs M12 hex head bolts partly threaded – 200mm long
2 pcs M12 round washers
4 pcs M6 bolts 100mm
8 pcs M6 round washers
4 pcs M6 hex nuts
4 brass colour screws 50mm
The materials list above is for one vise.
If you want to make two vises like I did in the youtube build video, just double the amount of pieces in the materials list.
STEP 1:
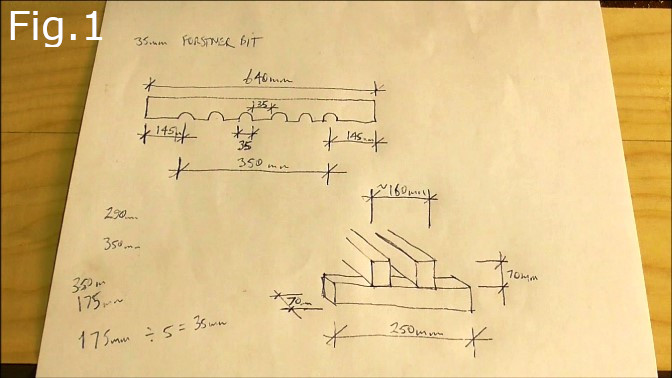
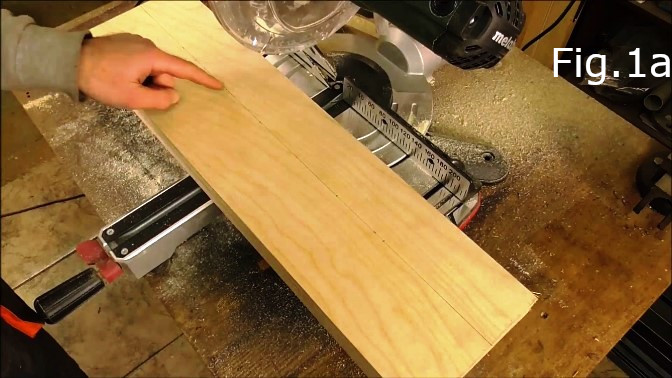
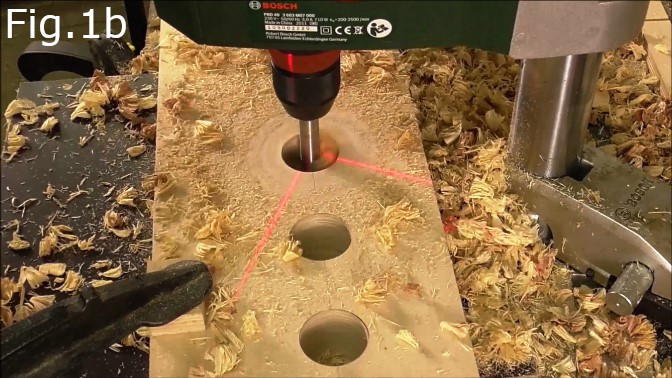
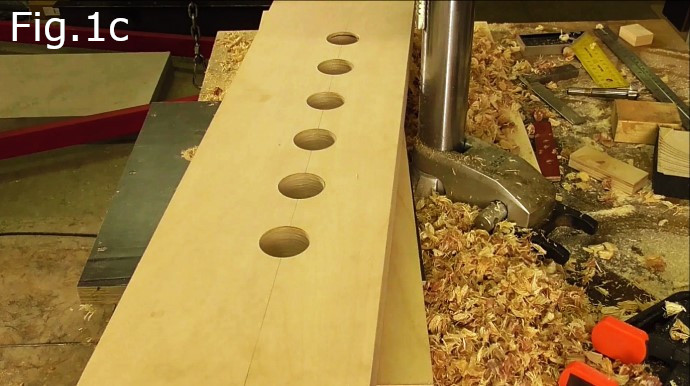
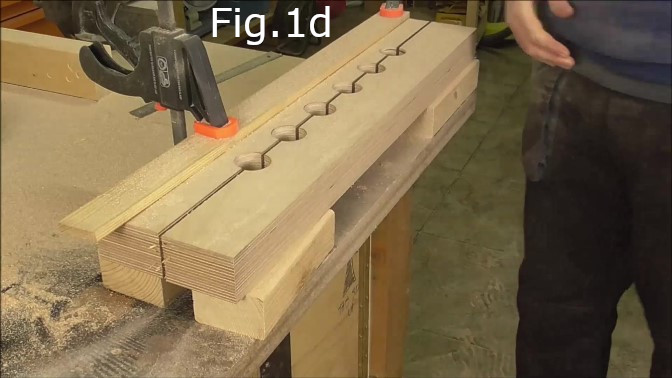
The first items to cut on the materials list are the two main 640mm long birch plywood pieces. These pieces require six 35mm diameter semi circle cuts in each piece. In my youtube video I marked out where to drill six holes on one piece of plywood at 70mm centers (Fig.1a & 1b) and then cut this piece in half (Fig.1d). You could also achieve the same result by cutting the two 640mm pieces to size and then clamping them together and drill the holes along the joint line. Drilling the holes I used a 35mm Forstner bit in my drill press. The first and last holes are centered 145mm from the ends of each piece.
STEP 2:
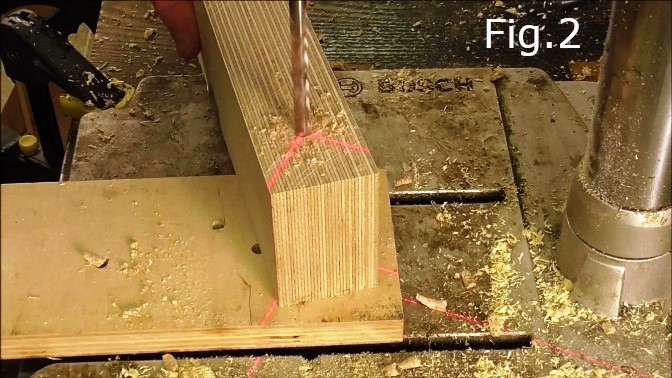
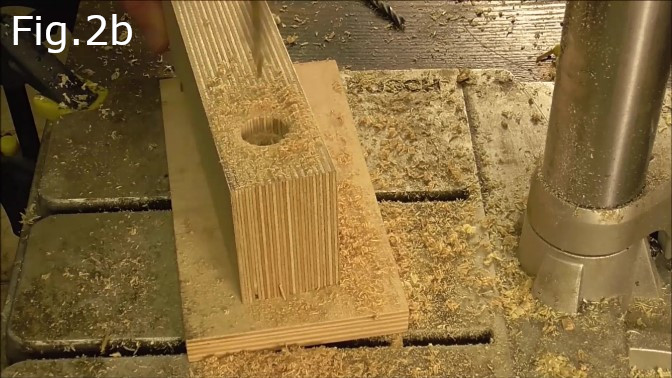
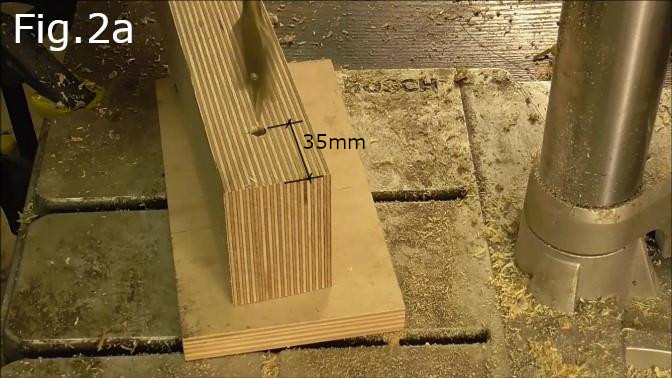
Drill a hole for a 6mm hex bolt in each end of both pieces of the 640mm birch plywood. The holes need to be centered 35mm from the ends of each piece (Fig.2 & 2a). Next I drilled a recess for the bolt heads with a 20mm diameter Spade drill (Fig.2a). The recess is 10mm deep.
STEP 3:
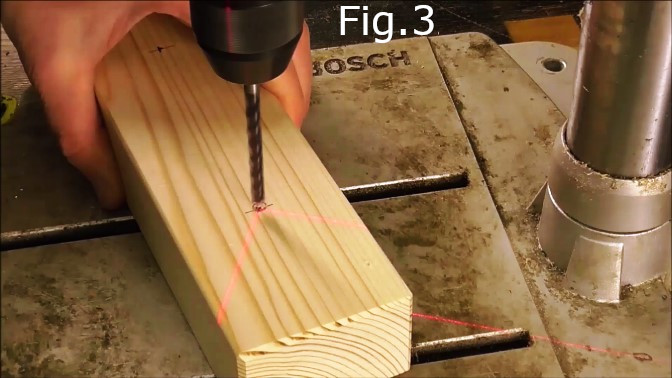
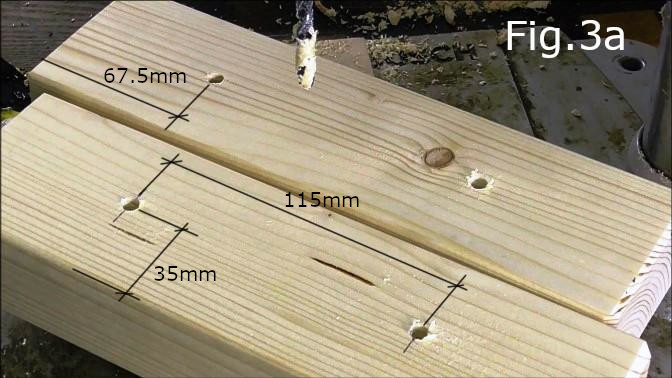
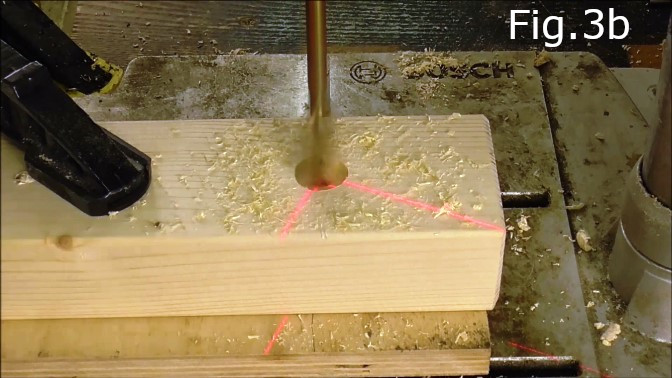
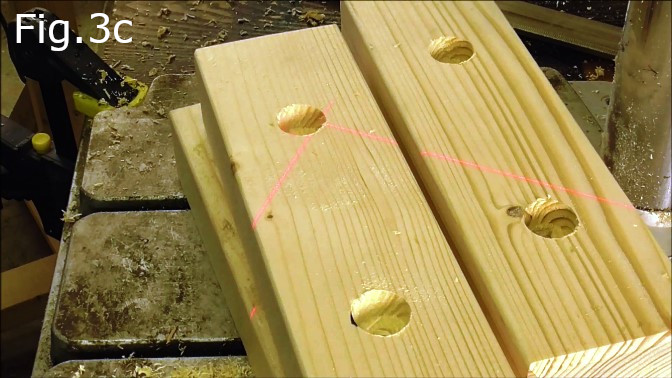
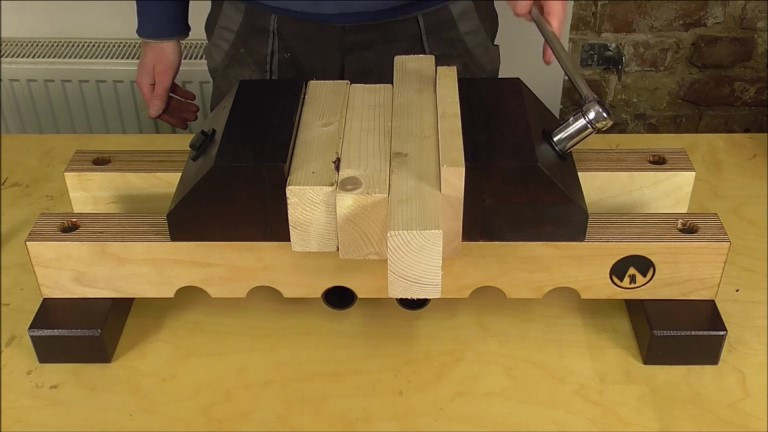
Next take the two pine pieces 250mm x 70mm and drill holes for the M6 bolts (Fig.3). These two pine pieces are the legs for the vise. You can allow for drilling inaccuracies by drilling these holes with a 7mm or 7.5mm drill bit, doing this will make it easier to align the legs with the rest of the vise. The holes are 115mm apart (Fig.3a) and centered on each piece. Take the 20mm spade drill used previously and drill recesses for each of the holes for the M6 nuts to a depth of 15mm (Fig.3b). These recesses will be on only the bottom side of the legs (see Fig.3c, Fig.9b & Fig.10).
STEP 4:
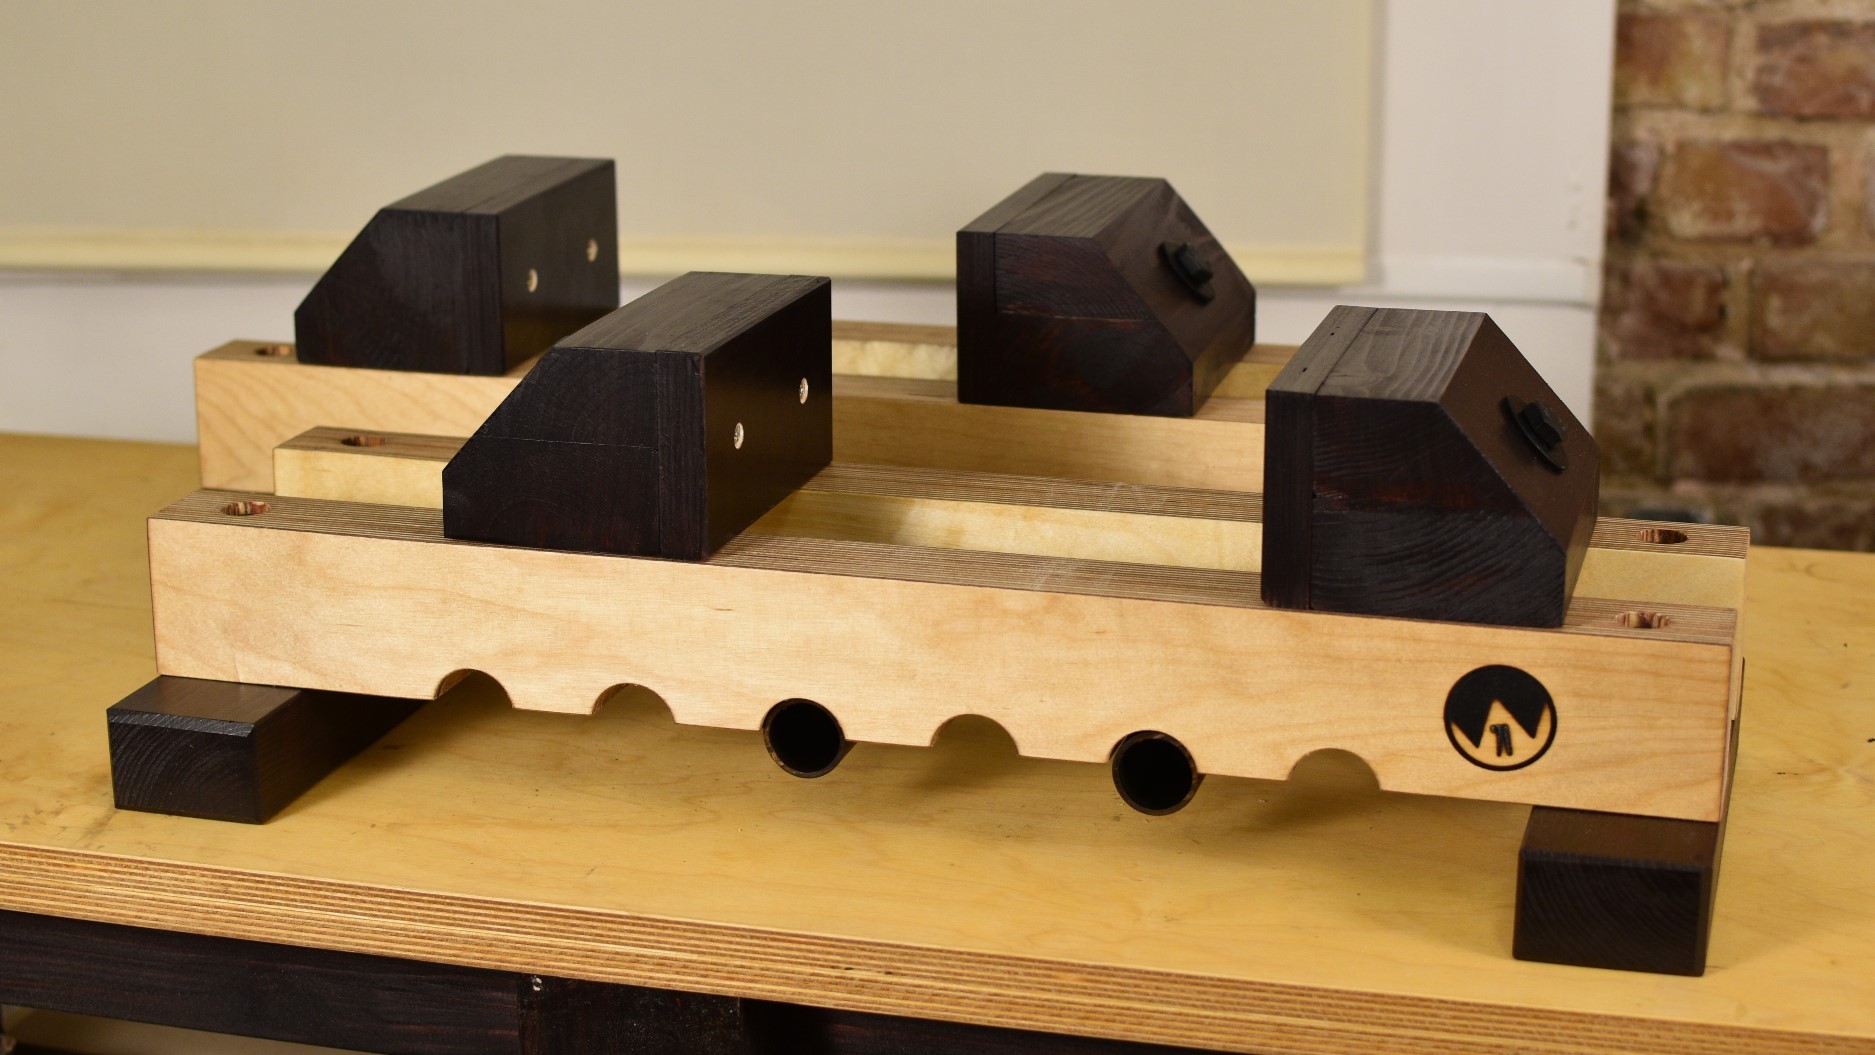
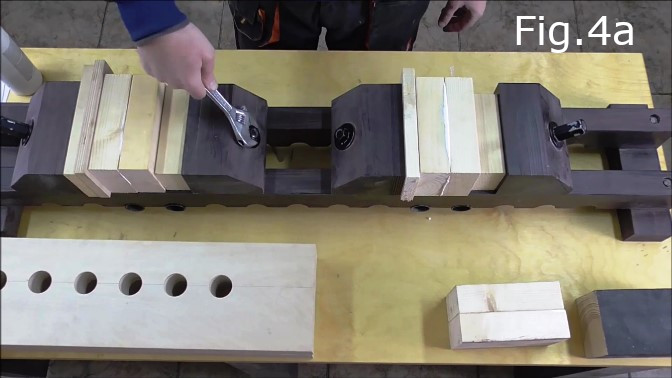
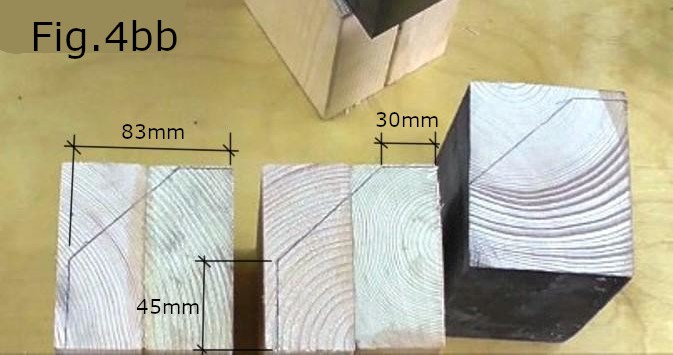
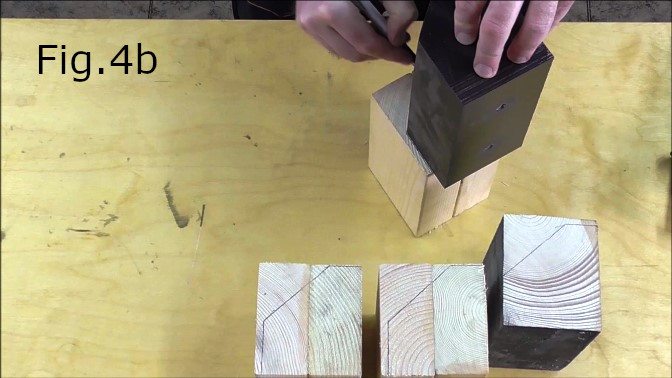
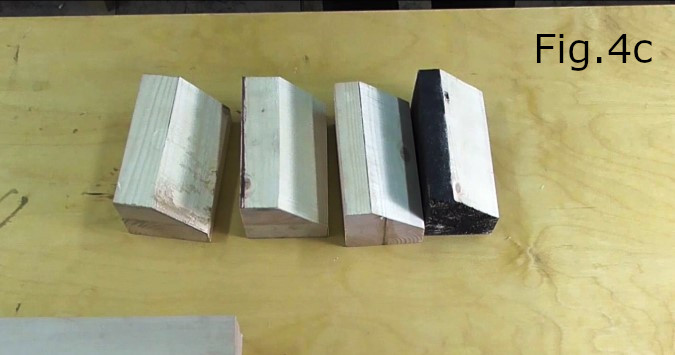
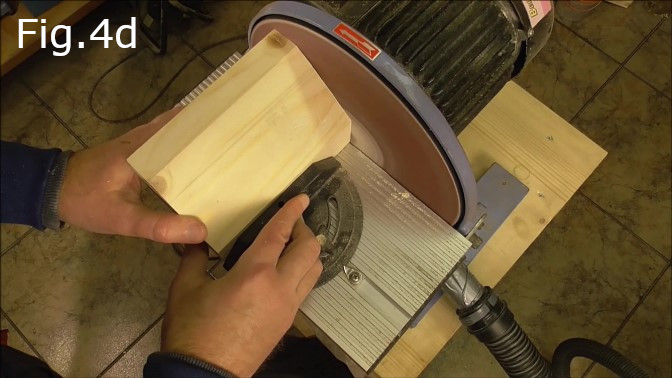
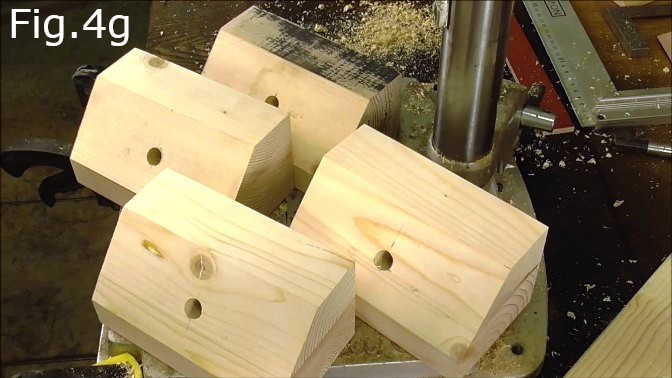
Next glue the four 160mm pine pieces to make to separate pieces for the jaws (Fig.4 & Fig.4a). Once the glue has dried cut both the jaws according to outline and measurements in Fig.4b and Fig.4bb. You should then have two jaws that look like those in Fig.4c. In my video I made 4 jaws. Also in my video I cut the jaws using a hand saw. However you could cut these on a table saw by angling the blade and using a cutting sled. Sand the jaws smooth checking for squareness (Fig.4d).
STEP 5:
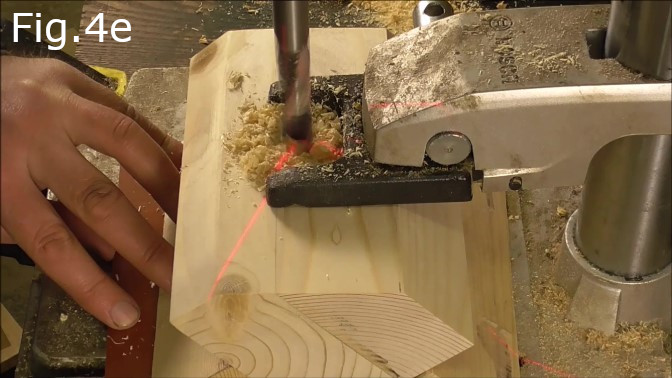
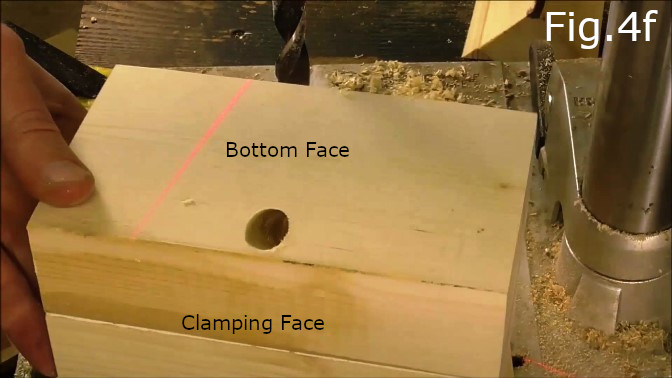
Drill the holes in the jaws for the 200mm M12 bolts. These holes should be drilled at a 90 degree angle to the angled back face of the jaws (Fig.4e) so the bolts come out just behind the front clamping face of the jaws (Fig.4f). The best way to drill the holes is to use a drill press with some V blocks or a piece of wood cut at a 45 degree angle clamped on either side of the jaws to ensure they don’t move.

STEP 6:
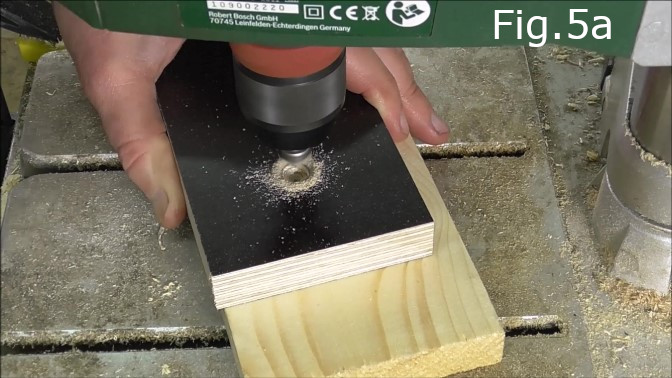
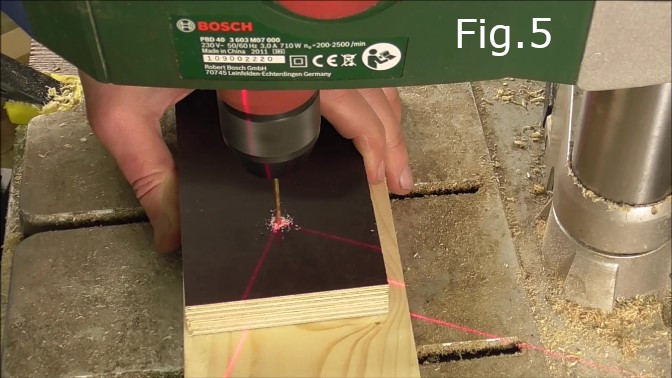
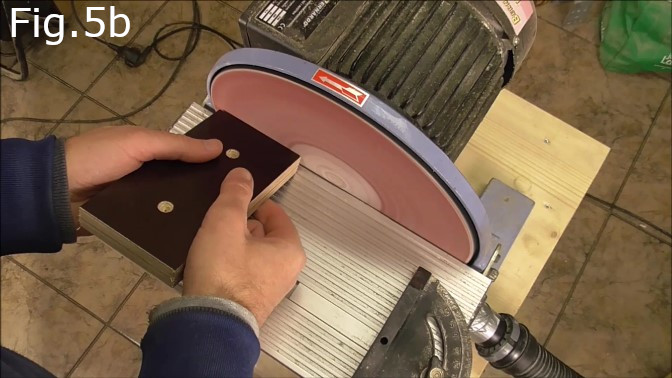
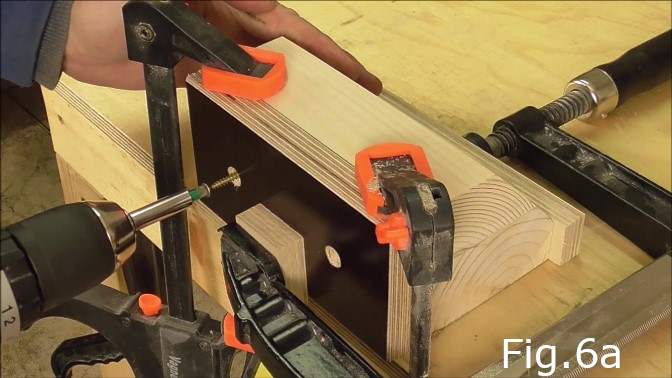
Take the two 18mm laminated plywood pieces and drill holes for the brass coloured screws (Fig.5) and countersink the holes (Fig.5a). Sand the sharp edges off (Fig.5b). Next clamp the laminated plywood to the jaws and clamp both to a work table. Drill holes for the screws into the jaws (Fig.6). Screw in the screws (Fig.6a)

STEP 7:
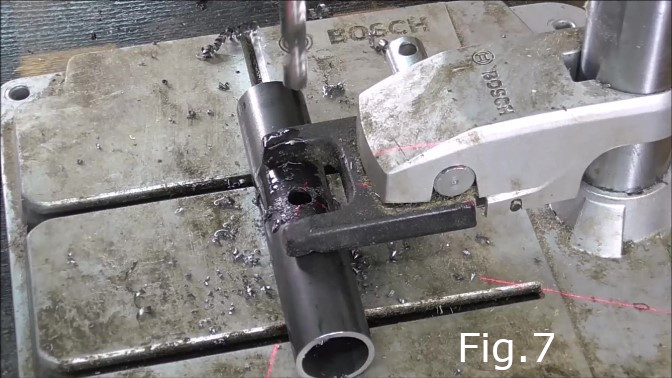
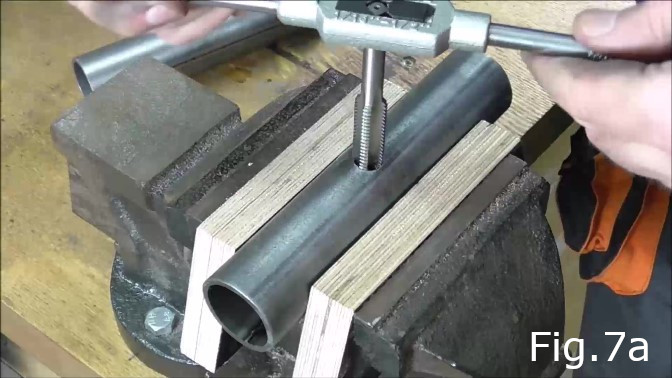
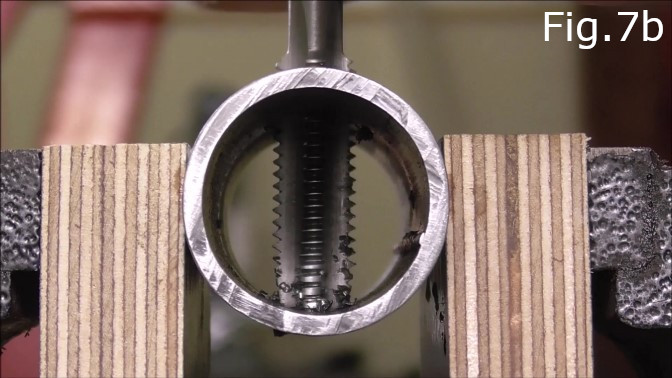
Drill and tap the holes in the steel pipes for the M12 bolts (Fig.7). Take the two 155mm pieces of steel pipe and drill an 11mm or 10.5mm hole through the center. The drill size you choose depends on the size of the thread of your M12 bolts. For 1.25mm thread use the 11mm drill. For 1.5mm thread use the 10.5mm drill. Tap the holes using an M12 tap (Fig.7a) with the corresponding thread size, 1.5 or 1.25mm. Make sure your tap is long enough to tap both sides of the pipe (Fig.7b) so the threads are aligned. The M12 bolts you buy from a hardware store will most likely be coarse thread 1.5mm. These are the bolts I used.
STEP 8:
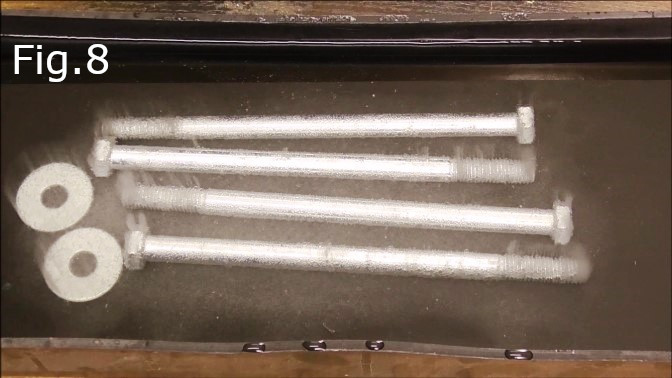
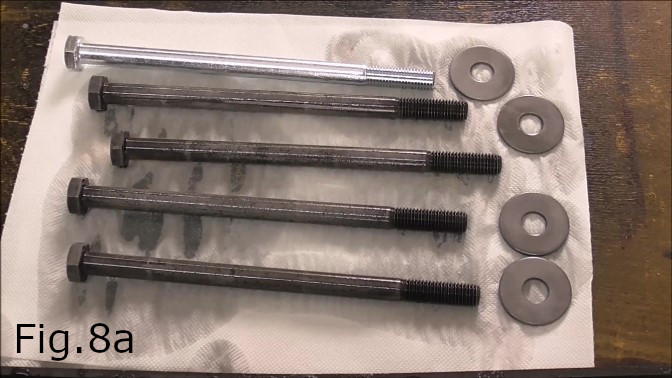
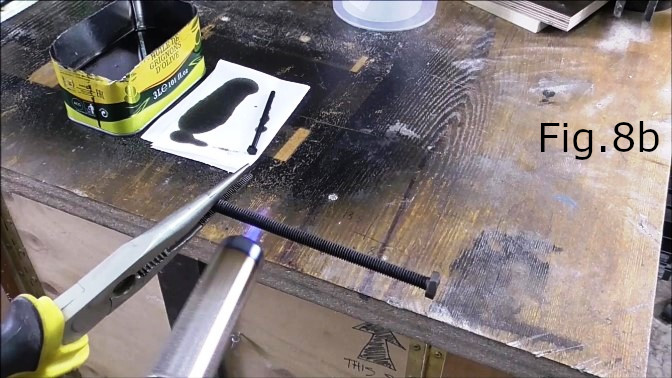
Degalvanise the nuts, bolts and washers. Mix citric acid into a container of water. Put the nuts, bolts and washers into the container (Fig.8). Leave for an hour. If necessary turn the parts over in the bath after 30 minutes to make sure you remove all the zinc coating (Fig.8a). You can avoid this step if you buy black oxide coated nuts, bolts and washers. Next coat the metal pieces with old diesel engine oil by heating the parts using either a gas torch (Fig.8b), like I did, or use an oven which can heat parts to at least 280 degrees Celsius or 536 degrees Fahrenheit. Ideally the steel should be an even dark blue colour before dunking the parts in the old engine oil (Fig.8c).
STEP 9:
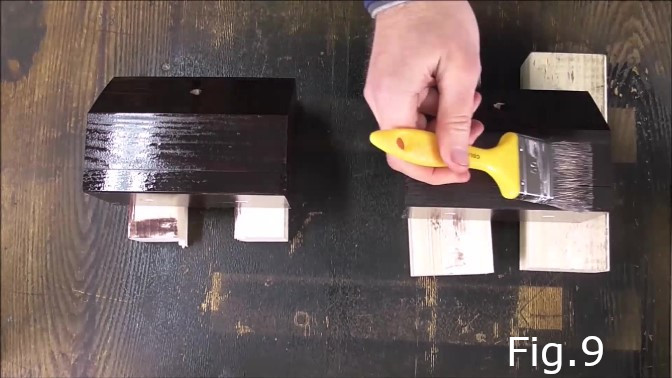
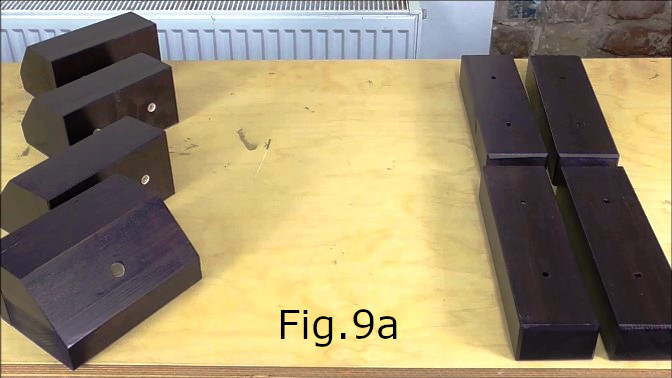
Stain the jaws and legs with a dark wax stain (Fig.9 & Fig.9a)


STEP 10:
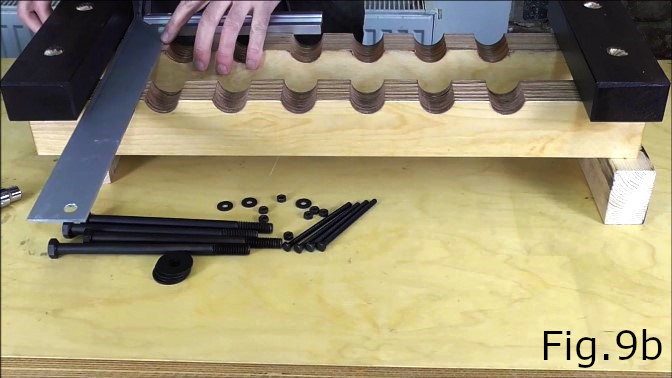
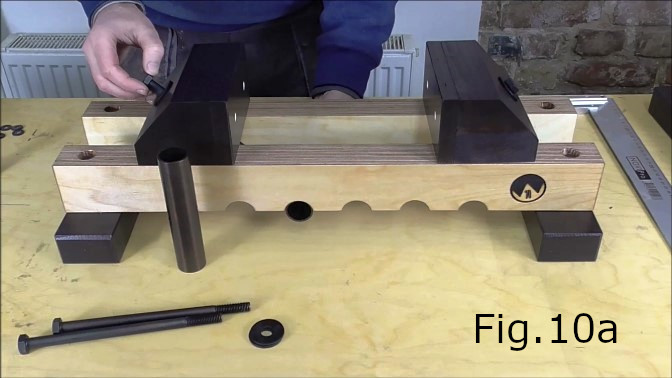
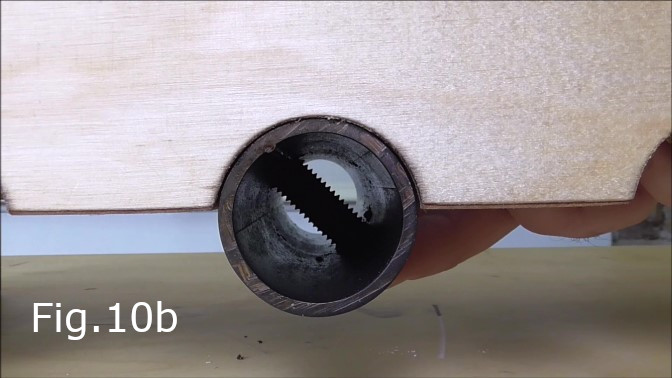
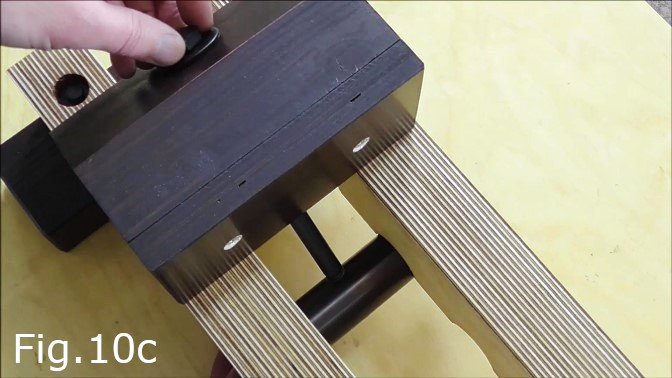
Now that all the parts are finished. Assemble the vise. Bolt the legs to the 640mm plywood pieces. The easiest way to do this is turn everything upside down and place the parts on wooden blocks to lift them off the table (Fig.9b & Fig.10). The four 100mm M6 bolts are used to attach the legs. Place the bolts so that when the vise is the right way up the bolt heads will be visible (Fig.10c) not the end of the bolt with the nut. Once the bolts are in place using washers under the heads and also the nuts. Check the legs for squareness with a set square (Fig.9b) then tighten the nuts (Fig.10). Next turn the vise the right side up, take both jaws place them on the vise rack facing each other and thread one of the M12 bolts through each of the jaws (Fig.10a). Next take one of the steel pipes and thread the M12 bolt through both sides of the pipe (Fig.10b & Fig.10c). Do this for both jaws. Now your vise is ready to use.